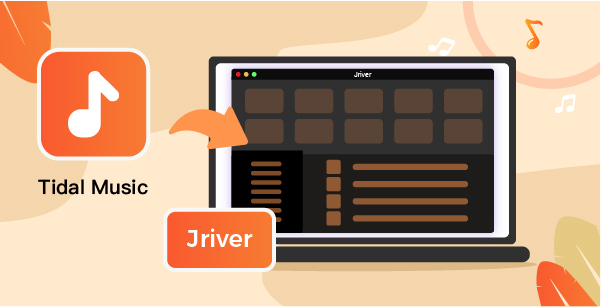
JRiver is a comprehensive and seamless tool that lets users manage and play media files such as videos, music, audio, among others. More so, you can configure JRiver to focus on your specific needs like recording television broadcasts. This software is regarded as the leader in audiophile quality sound. It is pretty a powerful media database and an essential management tool for a large collection of files. You can connect media from Netflix, YouTube, Last.fm, and Hulu and send to Flickr and Twitter, among others. It also plays with various MP3 players, DLNA, or DAC players, among other devices. At this point, you may already be wallowing for answers to whether JRiver Tidal integration is viable so that you can stream Hi-Res Tidal music on your favorite device.
Well, this is not directly accessible. However, you can engage reliable third-party tools to enable you to access Tidal music on JRiver directly. It would be a great experience to experience JRiver Tidal streaming and feel the impact of the most two powerful tools combined. That’s exactly what this tutorial will offer you. Check out the below steps to extract Tidal music and access them on JRiver in only 3 steps.
Part 1. Download Tidal for JRiver: What You Need
As mentioned earlier, you need a powerful tool to get JRiver and Tidal to work together. And AudKeep Tidal Music Converter is here to solve any misery on streaming your favorite Tidal playlist on JRiver Media Center. AudKeep will let you download HiFi and high-quality Tidal songs on your computer while removing any viable restrictions for free streaming. This app works at a super-efficient speed of up to X5 rate for batch conversion.
Use AudKeep to convert Tidal music to MP3, Lossless, M4B, AAC, and many other common formats. It will give you 100% lossless audio quality of the original Tidal files as it carefully retains the metadata information and ID3 tags. In the end, you will easily sort out and manage the converted Tidal files by artist or album.
AudKeep Tidal Music Converter for JRiver
- Get HiFi and high-quality converted Tidal music
- It runs at a faster speed of 5X rate
- Organize your music files by artist or album
- It will convert Tidal music to various output formats
Part 2. How to Stream Tidal through JRiver
We gladly bring you easy steps for JRiver Tidal streaming through the recommended app, AudKeep Tidal Music Converter. Get its free version or upgrade to the full version for advanced features. Start by downloading and installing AudKeep on your computer. Then launch it and click the “Log In” button to log in with your Tidal account credentials then proceed with these steps.
Step 1 Edit output parameters for JRiver
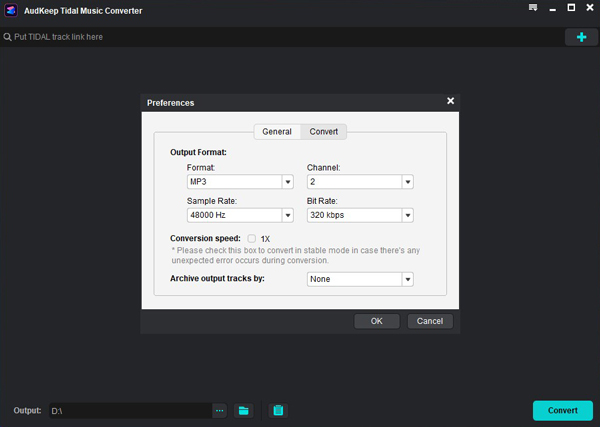
You have the freedom to customize the output format and parameters to your choice. Just go to the “Menu” icon and hit the “Preferences” option. Then click on the “Advanced” icon and you will realize the settings window pop up. Here, begin to set the output format to MP3 or any other. Also, go ahead to customize other parameters which include audio codec, channel, bit rate, and sample rate, then click on the “OK” button.
Step 2 Add Tidal music to AudKeep app for JRiver
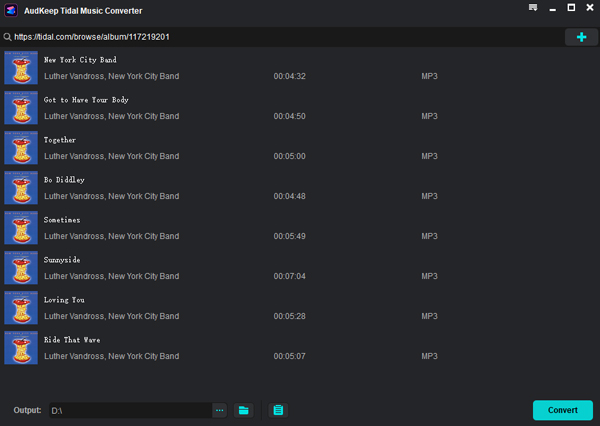
Identify which Tidal playlist of music you wish to be converted to. Select them from your Tidal Music Library and then click on the bright blue “+” icon to add them to the AudKeep interface for conversion.
Step 3 Convert Tidal music for playback on JRiver
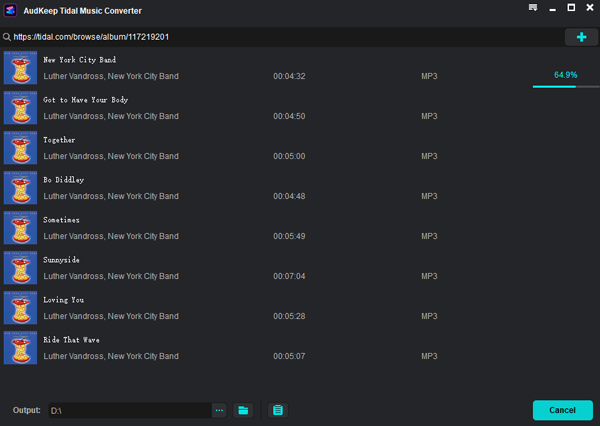
Now it’s time to get your Tidal music converted to your preferred format. Just click on the “Convert” button and AudKeep will commence the download and conversion of all files. Next, check for the converted Tidal music in the “Converted” folder in your computer’s local storage.
Step 4 How to Stream Tidal Through JRiver
Finally, JRiver and Tidal can together bring joy to your ear. Your Tidal music is now free from restriction and you can stream it on any platform.
- Check for the converted Tidal music from the “Converted” folder on your computer and then drag and drop them to JRiver Media Center.
- Then choose any Tidal hit and hit the “Play” button. It will play on JRiver.
Part 3. How to Play Tidal on JRiver
You can also choose to stream Tidal JRiver via DLNA/DAC and WDM Driver.
Play Tidal River using DAC (Digital-to-Analog Converter)
- First, you need to install BubbleUPnP on your device.
- Next, modify the settings to log into your Tidal account then sign in to your Tidal app account.
- Then use the DAC application to stream Tidal music on JRiver on your device.
Note: This option is suitable only for devices that have DLNA or DAC such as Android, Chromecast, Google Home, and Google Mini.
Play Tidal JRiver Using WDM Drive in the System
Generally, the WDM driver will be disabled. You must first activate the driver to enable the playing of Tidal music on the JRiver player.
- To enable the WDM driver, go to the JRiver app and tap on “Options” > “General” > “Features”, then enable the “WDM” drive option.
- Next, restart the JRiver and go to the “Control Panel” tab.
- Then click on the “Sound” option and select the “JRiver Media Center 20” app.
- Tap on the “Set Default” button to assign JRiver as your default player in your computer system.
- Finally, you can get JRiver Tidal to work on your computer and then play Tidal through JRiver Media Center.
Part 4. Conclusion
You must be as happy as a deer having successfully managed to stream JRiver Tidal in simple steps. Thanks to AudKeep Music Converter that makes it possible to convert any Tidal playlist and music to acceptable common output formats.
